Saturday, February 4, 2012

Sarah's 8th Birthday

Happy Birthday Sarah!

We celebrated Sarah's 8th birthday last weekend with a Baking Party!  It was such an adorable party and everything turned out so well.  10 of her classmates came to "Sarah's Kitchen" to bake with Miss Liz from Food Jules.  It was so wonderful to have someone else run the party - I just got to stand back and take lots of pictures to remember the fun!


I googled 'baking party' and came across a wonderful site called One Charming Party.  That is where I found the garland and hat making ideas for the party.  For the garland I simply strung cupcake liners and coffee filters on a string and hung it from our front mirror.  


Once all the girls had arrived we decorated chef hats with 'cup cake liner flowers'.  It was so simple.  They glued some coffee filters and assorted cupcake liners together to create the flower which and I then pinned to their chef hat.  


Here is Chef Sarah!


Next, the girls started baking!
Sarah was able to select the menu for the party.  She choose from 3 egg dishes, 3 waffle/pancake dishes, and 3 desserts.  These were Sarah's yummy choices for the party.


Once the food was in the oven the girls did the clean up and set the table themselves.  They were even excited about sweeping!

Finally, they sat down to enjoy their hard work!


Here is Jillian modeling the party favor aprons.  I ordered kids aprons from KNG and then simply ironed on the girls first initial (I had enough letters for Jillian and Sarah to get their full names on their aprons ; ).


These scones tasted as yummy as they looked.  The girls did a GREAT job!


Happy Birthday to our Sweet Sarah!


Sunday, December 18, 2011

Christmas Fun Day

We have been getting together with another family for little 'educational days'.  The idea is to provide some enrichment activities outside of school.  So far we have met for a Fizzy Fun Day, a Math Games Day, and now a Christmas Fun Day!

Here was our line-up of activites.......

First, I read How the Grinch Stole Christmas and then had the kids come up with some adjectives describing the Grinch.
Idea found here on Pinterest.


Then we played this simple memory game.  The kids looked at the tray for a minute or two and then went off to different rooms to write down all the items that they remembered.


Then, we read The Sweet Smell of Christmas.  We have done this activity at the kids preschool and I just loved the idea.  It is now one of our family traditions.  I put all the scented items from the book into little bowls for the kids to pass around as I read.  The 6 different items were: gingerbread, peppermint candy canes, cocoa power, apples and cinnamon, evergreen, and oranges.


Then the kids needed a sweet treat, so we made some hot chocolate and the kids used these 'North Poles' to stir some peppermint, marshmallow and chocolate into their cocoa.


Finally, the kids played in SNOW.  The idea was to spell out some spelling and trick words into the shaving cream but that didn't really happen.  If you do plan on spelling words in the shaving cream be sure to use only a thin layer of cream, otherwise it doesn't really work.

Already looking forward to our next Educational Day!

Monday, November 14, 2011

Cranberry Day

I needed some ideas to entertain the kids during our day off from school last week and decided on a Cranberry theme!  First, the kids 'experimented' with some cranberries - checking out if they float or sink and why, bouncing them and cutting them open to investigate the inside.


 Cranberry Playdough

Next, we boiled half a bag of fresh cranberries and then strained the cranberry mush out to make some 'cranberry water' for playdough.


We used the strained 'cranberry water' in a stove top playdough recipe.

2 cups flour
1 cup salt
1Tbsp oil
1 Tbsp cream of Tartar
2 cups 'cranberry water'

Mix all ingredients in a pot on medium heat and stir until it starts to form a ball.  Remove from pot and knead.

Here is our naturally colored playdough!

 
And here is the Cranberry Bakery - Open for Business!


 Then we read the book Cranberry Thanksgiving.


.....and used the recipe at the back of the book to make some

"Grandmother's Famous Cranberry Bread"

 (we modified the recipe by using whole wheat flour and walnuts instead of raisins)

Yum!

Cranberry Day activities found at Superheros and Princesses

Saturday, October 29, 2011

Fizzy Fun Day

Wow!  I have not posted anything in months!  Things are pretty busy around here.  The little baby is no longer little and is keeping us very busy.  The start of school, programs and activities have been keeping us on the run.  Crafting fun has been on the back burner lately. 

Fizzy Fun Day with friends had been in the works for a while but schedules etc. prevented us from getting together.  We finally planned a date and had a blast!  Unfortunately, I did not have my camera ready to shoot the fun but I still wanted to document the activities for future reference - so here we go!

Fizzy Foaming Sugar Sticks

Mix 1/2 cup of sugar with 1 pkg of Kool-Aid
Take 1 Tbsp of the sugar/Kool-Aid mix and combine it with 1/8 tsp baking soda
roll up some paper to make a funnel and spoon the mixture into a straw that has been bent closed at the bottom

Pop some in your mouth and enjoy the fizzy sugar stick!  The kids all loved this one.

Volcano

This was the most popular activity with the kids because it was the more involved and required the most steps.

First we made some Kool-Aid playdough to help form the volcano.

1 1/4 cup flour
1/4 cup salt
1 pkg Kool-Aid
1 Tbsp Cream of Tartar
1 cup boiling water
1 1/2 Tbsp oil

Combine all the dry ingredients in a bowl.  Add the oil to the boiling water and then pour that into the dry ingredients.  Stir together and then knead on a sheet of wax paper.

Then the kids used the playdough to mold the volcano around a mini water bottle.  They went outside to grab some leaves, grass etc. to decorate the volcano and make it look more real. 

Next, we added 3 tsp of baking soda into the water bottle and a few drops of food coloring (red would have been more lava like, but we didn't have any).  Finally, I poured in about 1 1/2 cups of vinegar while the kids ohhhhh'd, ahhhhhh'd and cheered.


Here is the aftermath of the blue lava volcano.


Fizzy Explosion

paper towel cut into a 5x5 inch square
1 1/2 Tbsp of baking soda

Fold the paper towel into thirds both ways with the baking soda in the center to form a little packet.

Next, prepare a ziploc sandwich bag with 1/2 cup vinegar and 1/4 cup warm water.  Close the baking soda packet into the sandwich bag, being careful to close the bag without the packet coming in contact with the vinegar/water.  Once the bag is carefully sealed, go outside and let the packet fall into the vinegar/water solution.  It's best to put the bag on the ground because the bag is going to POP!  Two of our bags popped really quickly while the other 3 took a little longer - which only added to the kids excitement!


Finally........

Soda Pop Explosion

1 2L bottle of Diet Coke
1 pkg of Mentos

Prepare a paper roll to hold the mentos.  Set the pop bottle outside.  As quickly as you can, drop all the Mentos into the pop bottle at once and back away!  The bottle will fizz up in a GREAT DRAMATIC VOLCANO .......... that lasted about 2 seconds.  Really, the video I watched on youtube had me expecting a much more dramatic result but the kids still thought it was neat.

And there you go!  A fun afternoon of Fizzy Fun and experiments for the kids to enjoy!

The above fizzy experiments and more can be found at Superheros and Princesses
Idea for the Soda Pop Explosion found at Frugal Family Fun Blog


Sunday, June 19, 2011

Sunflower Snack

WOW!!!  I have not posted in soooooo long! 
We have been busy playing outside.  Since the kids have learned how to ride their bikes that is where we are spending all our free time.  They love it!
I thought I would post this cute snack I had ready for the kids when Sarah came off the bus last week.  Super easy and healthy too.

{cheddar cheese cut into triangles, red grapes, a celery stalk, and a bunch of crackers}

The kids enjoyed munching on their 'sunflower'......


......and then returned to biking and scootering!


Idea from Edible Crafts.

Tuesday, May 24, 2011

Learning to Ride a Bike - Part 2

Last week I posted how we took the pedals off the girls bikes to help them learn how to ride.  They have not practiced at all this past week since we were away on an extended weekend trip to Canada to visit with family.  They took their bikes out this afternoon and started cruising and gliding around.  They looked so comfortable and confident that I suggested we put the pedals back on.

SUCCESS!!!
Once their pedals were back on they literally just took off!


This method worked so well for us!  Rather than the girls depending on Chris or I to hold onto the bike, they were independent in the whole process.  Added bonus:  no sore backs from running along behind them!


Wednesday, May 18, 2011

Mini-Marshmallow Shooters

 With all the rain we have been having, the kids were in need of a fun activity.  So I thought we would try this quick and cool idea from Real Simple. 

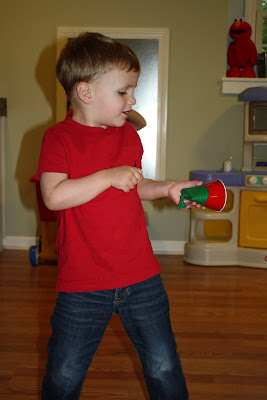
Just cut the bottom off some plastic or paper cups, cut the tops off some regular sized balloons and stretch the balloon over the bottom of the cup.


Then pop a mini marshmallow into the cup, pull back on the balloon, and release!
Our marshmallows were shooting out like bullets!!!
In fact, this is probably a better out door activity!


The kids thought this was a great!  Poor 'Tickle me Elmo' that you see in the background of this pic ended up becoming target practice until the temptation of playing with mini marshmallows was just too much and the kids gobbled them up!  Yes, they ate up the ones that had been flying off the walls and floors!  Yuck.


This would be great to play outside to see whose marshmallow flies the farthest.  We will be re-visiting this activity on a sunny day.

Tuesday, May 17, 2011

Learning to Ride a Bike

Chris and I thought it was time to take the training wheels off the girls bikes.  If it was up to Sarah she would have continued with training wheels until she was a teenager.  She has not been interested in learning to ride her bike and would much rather skip along, pick up bits of nature, and build a little fairy house.  Jillian on the other hand has been showing interest.

So, the other weekend we took off the trainers, loaded up the bikes and the kids, and went to a park that was relatively flat.  After an hour of biking Chris and I had sore backs and all of us were frustrated!

Once home I searched the internet for some ideas on how to teach children to ride.  I came across the brilliant idea of lowering the seat and removing the pedals!  Here is a youtube video from REI.  Now, this may be common knowledge but since this is our first time trying to teach one of our kids how to ride a bike we thought it was marvelous!  Check out the video for all the details.

This is Jillian today.  She has probably had a total of 45 minutes of practice time without the pedals.  She can now easily balance her bike and can manage turns too!


Sarah has not had as much practice time as Jillian, but I can already tell that she is starting to get the hang of it!   


Most importantly they are so excited about learning and love the feel of cruising around on their bikes!


Once they are super confident gliding around we will put the pedals back on and {hopefully} watch them take off! 

Monday, May 16, 2011

Busy Boy

Things look different around here.......
Nathan no longer sleeps for hours on end in the swing and he no longer bounces happily {safe and contained} in the bouncy chair.
Nooooooo!

Now, he pulls himself up to standing on almost everything he can.....

.....crawls around the entire house

.....gets into mischief

.....and charms us and warms our hearts everyday. 

Our sweet little Nathan is such a blessing!

BUT because Nathan has become so busy I have not been able to craft or organize activities with the kiddos like I once did!
PLUS the weather is turning beautiful which means playing outdoors and going to the park....it means running, climbing, blowing bubbles, riding bikes, scooting, swinging, and jumping rope!

I still have lots of activities and crafts that I plan on doing with the littles, but it will not be at the same frequency as when the weather was cold and we had a sleeping baby that kept us indoors!

{now.....off to clean up the cheerios, smooshed blueberries and smashed banana from the highchair and kitchen floor!} 

Tuesday, May 10, 2011

Paper Flowers

Last week was such a busy week with Mother's Day parties and school events.  I made it to Matthew and Jillian's special events without issue but somehow.....somehow.....I mixed up the times in my head for Sarah's Mother's Day Tea in her Grade 1 class.

I arrived 1/2 hour late and was met by a crying daughter who had been missing her Mommy.  Ohhhhh the guilt that I felt - I can not even tell you!  I'm tearing up again just writing this!

Despite the very rough start we were still able to enjoy ourselves and our time together.


She is growing up so fast!

After I left her class I went back home, wallowed in my Mother's guilt, and shed many tears over my silly mistake.  I wanted to make her a special card and remembered this pretty paper flower tutorial.  Here is the flower I made to adorn Sarah's card.  She loved it!


On a more positive note, Sarah's top front tooth FINALLY fell out this morning.
She is looking forward to a visit from the tooth fairy tonight!
{the tooth fairy will NOT mess this one up}

Monday, May 9, 2011

Bookworms

I can't remember where I saw this cute little snack.  It was perfect for Sarah - our book worm.  Simply a few gummi worms in a bag with a cute little note attached that encourages reading.

It doesn't get more simple than that - and lets your little one know that you are proud of all their reading!


Thursday, May 5, 2011

Chocolate Chip Waffle Cookies

Look like waffles......taste like cookies!!!
Delicious fun!


The kids thought these were the coolest little cookies!
I used a classic chocolate chip cookie recipe {with way too much sugar and way too much butter} and baked them in a waffle iron!  It takes a little longer since you have to make smaller batches but totally worth it for the novelty of WAFFLE COOKIES!

Sarah was thrilled to snack on these when she came home from school.

I had the waffle iron turned up a little too high and I baked them a little too long but they still turned out great.  Next time, I will try our usual healthier cookie recipe in the waffle iron and see how that turns out.

Idea from FineCooking

Tuesday, May 3, 2011

Rainbow in a Jar

I came across this book while browsing through the library and thought it would be a great little activity to try!
Here is what you will need......


.....plus a spoon, measuring cup, and a large mason jar or glass cylinder that can accommodate 2 1/2 cups of liquid.


Purple - mix 1/2 cup corn syrup with 1 drop blue and 1 drop red food coloring.  Pour into jar.


Blue - slowly pour 1/2 cup of blue dish soap down the side of your jar.

Green - mix 1/2 cup water with 2 drops green food coloring.  Tip your jar and slowly pour the water down the side of the jar.

Yellow - slowly pour 1/2 cup olive oil down the side of the jar.

Red - mix 1/2 cup rubbing alcohol with 2 drops red food coloring.  Tip your jar and slowly pour the alcohol down the side of the jar.


Here is the finished product!!!


This is a great little science lesson on the density of different liquids and on how some liquids don't mix (water and oil layers).  This book has easy, kid-friendly pictures, instructions, and explanations.

Have fun making your own liquid RAINBOW!


Monday, May 2, 2011

Book Eater

Ever since Sarah got to the point where she could read chapter books silently, she has not put them down!  She loves reading!

Reading rather than eating.....


Finding little nooks around the house to curl up and read in ......


And my favorite.....the moment our early morning Easter egg hunt was done she plopped down on the couch to read some more : )


Since she has been devouring books I thought I would surprise her with this monster page corner bookmark! 


All you need is some cardstock, scissors, a ruler, a pencil and some glue.  This was a quick and easy little craft.   Just head on over to I Could Make That for great step by step pictures and instructions.

Happy Reading!

Related Posts Plugin for WordPress, Blogger...